Overview
In addition to traditional (sometimes called monolithic) application architectures, Nest natively supports the microservice architectural style of development. Most of the concepts discussed elsewhere in this documentation, such as dependency injection, decorators, exception filters, pipes, guards and interceptors, apply equally to microservices. Wherever possible, Nest abstracts implementation details so that the same components can run across HTTP-based platforms, WebSockets, and Microservices. This section covers the aspects of Nest that are specific to microservices.
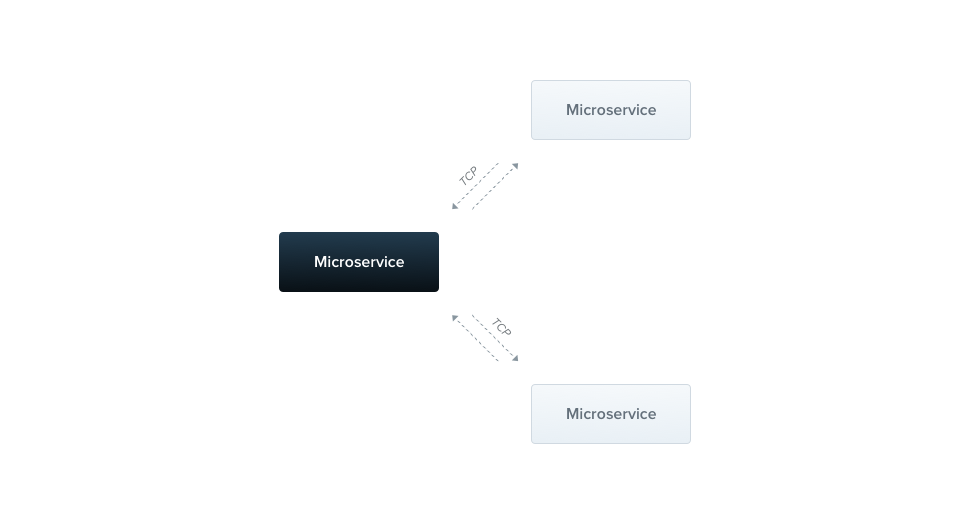
In Nest, a microservice is fundamentally an application that uses a different transport layer than HTTP.
Nest supports several built-in transport layer implementations, called transporters, which are responsible for transmitting messages between different microservice instances. Most transporters natively support both request-response and event-based message styles. Nest abstracts the implementation details of each transporter behind a canonical interface for both request-response and event-based messaging. This makes it easy to switch from one transport layer to another -- for example to leverage the specific reliability or performance features of a particular transport layer -- without impacting your application code.
Installation
To start building microservices, first install the required package:
$ npm i --save @nestjs/microservices
Getting started
To instantiate a microservice, use the createMicroservice() method of the NestFactory class:
@@filename(main)
import { NestFactory } from '@nestjs/core';
import { Transport, MicroserviceOptions } from '@nestjs/microservices';
import { AppModule } from './app.module';

async function bootstrap() {
  const app = await NestFactory.createMicroservice<MicroserviceOptions>(
    AppModule,
    {
      transport: Transport.TCP,
    },
  );
  await app.listen();
}
bootstrap();
@@switch
import { NestFactory } from '@nestjs/core';
import { Transport } from '@nestjs/microservices';
import { AppModule } from './app.module';

async function bootstrap() {
  const app = await NestFactory.createMicroservice(AppModule, {
    transport: Transport.TCP,
  });
  await app.listen();
}
bootstrap();
info Hint Microservices use the TCP transport layer by default.
The second argument of the createMicroservice() method is an options object. This object may consist of two members:
transport | Specifies the transporter (for example, Transport.NATS) |
options | A transporter-specific options object that determines transporter behavior |
The options object is specific to the chosen transporter. The TCP transporter exposes
the properties described below. For other transporters (e.g, Redis, MQTT, etc.), see the relevant chapter for a description of the available options.
host | Connection hostname |
port | Connection port |
retryAttempts | Number of times to retry message (default: 0) |
retryDelay | Delay between message retry attempts (ms) (default: 0) |
serializer | Custom serializer for outcoming messages |
deserializer | Custom deserializer for incoming messages |
socketClass | A custom Socket that extends TcpSocket (default: JsonSocket) |
tlsOptions | Options to configure the tls protocol |
Patterns
Microservices recognize both messages and events by patterns. A pattern is a plain value, for example, a literal object or a string. Patterns are automatically serialized and sent over the network along with the data portion of a message. In this way, message senders and consumers can coordinate which requests are consumed by which handlers.
Request-response
The request-response message style is useful when you need to exchange messages between various external services. With this paradigm, you can be certain that the service has actually received the message (without the need to manually implement a message ACK protocol). However, the request-response paradigm is not always the best choice. For example, streaming transporters that use log-based persistence, such as Kafka or NATS streaming, are optimized for solving a different range of issues, more aligned with an event messaging paradigm (see event-based messaging below for more details).
To enable the request-response message type, Nest creates two logical channels - one is responsible for transferring the data while the other waits for incoming responses. For some underlying transports, such as NATS, this dual-channel support is provided out-of-the-box. For others, Nest compensates by manually creating separate channels. There can be overhead for this, so if you do not require a request-response message style, you should consider using the event-based method.
To create a message handler based on the request-response paradigm use the @MessagePattern() decorator, which is imported from the @nestjs/microservices package. This decorator should be used only within the controller classes since they are the entry points for your application. Using them inside providers won't have any effect as they are simply ignored by Nest runtime.
@@filename(math.controller)
import { Controller } from '@nestjs/common';
import { MessagePattern } from '@nestjs/microservices';

@Controller()
export class MathController {
  @MessagePattern({ cmd: 'sum' })
  accumulate(data: number[]): number {
    return (data || []).reduce((a, b) => a + b);
  }
}
@@switch
import { Controller } from '@nestjs/common';
import { MessagePattern } from '@nestjs/microservices';

@Controller()
export class MathController {
  @MessagePattern({ cmd: 'sum' })
  accumulate(data) {
    return (data || []).reduce((a, b) => a + b);
  }
}
In the above code, the accumulate() message handler listens for messages that fulfill the {{ '{' }} cmd: 'sum' {{ '}' }} message pattern. The message handler takes a single argument, the data passed from the client. In this case, the data is an array of numbers which are to be accumulated.
Asynchronous responses
Message handlers are able to respond either synchronously or asynchronously. Hence, async methods are supported.
@@filename()
@MessagePattern({ cmd: 'sum' })
async accumulate(data: number[]): Promise<number> {
  return (data || []).reduce((a, b) => a + b);
}
@@switch
@MessagePattern({ cmd: 'sum' })
async accumulate(data) {
  return (data || []).reduce((a, b) => a + b);
}
A message handler is also able to return an Observable, in which case the result values will be emitted until the stream is completed.
@@filename()
@MessagePattern({ cmd: 'sum' })
accumulate(data: number[]): Observable<number> {
  return from([1, 2, 3]);
}
@@switch
@MessagePattern({ cmd: 'sum' })
accumulate(data: number[]): Observable<number> {
  return from([1, 2, 3]);
}
In the example above, the message handler will respond 3 times (with each item from the array).
Event-based
While the request-response method is ideal for exchanging messages between services, it is less suitable when your message style is event-based - when you just want to publish events without waiting for a response. In that case, you do not want the overhead required by request-response for maintaining two channels.
Suppose you would like to simply notify another service that a certain condition has occurred in this part of the system. This is the ideal use case for the event-based message style.
To create an event handler, we use the @EventPattern() decorator, which is imported from the @nestjs/microservices package.
@@filename()
@EventPattern('user_created')
async handleUserCreated(data: Record<string, unknown>) {
  // business logic
}
@@switch
@EventPattern('user_created')
async handleUserCreated(data) {
  // business logic
}
info Hint You can register multiple event handlers for a single event pattern and all of them will be automatically triggered in parallel.
The handleUserCreated() event handler listens for the 'user_created' event. The event handler takes a single argument, the data passed from the client (in this case, an event payload which has been sent over the network).
Decorators
In more sophisticated scenarios, you may want to access more information about the incoming request. For example, in the case of NATS with wildcard subscriptions, you may want to get the original subject that the producer has sent the message to. Likewise, in Kafka you may want to access the message headers. In order to accomplish that, you can use built-in decorators as follows:
@@filename()
@MessagePattern('time.us.*')
getDate(@Payload() data: number[], @Ctx() context: NatsContext) {
  console.log(`Subject: ${context.getSubject()}`); // e.g. "time.us.east"
  return new Date().toLocaleTimeString(...);
}
@@switch
@Bind(Payload(), Ctx())
@MessagePattern('time.us.*')
getDate(data, context) {
  console.log(`Subject: ${context.getSubject()}`); // e.g. "time.us.east"
  return new Date().toLocaleTimeString(...);
}
info Hint
@Payload(),@Ctx()andNatsContextare imported from@nestjs/microservices.
info Hint You can also pass in a property key to the
@Payload()decorator to extract a specific property from the incoming payload object, for example,@Payload('id').
Client
A client Nest application can exchange messages or publish events to a Nest microservice using the ClientProxy class. This class defines several methods, such as send() (for request-response messaging) and emit() (for event-driven messaging) that let you communicate with a remote microservice. Obtain an instance of this class in one of the following ways.
One technique is to import the ClientsModule, which exposes the static register() method. This method takes an argument which is an array of objects representing microservice transporters. Each such object has a name property, an optional transport property (default is Transport.TCP), and an optional transporter-specific options property.
The name property serves as an injection token that can be used to inject an instance of a ClientProxy where needed. The value of the name property, as an injection token, can be an arbitrary string or JavaScript symbol, as described here.
The options property is an object with the same properties we saw in the createMicroservice() method earlier.
@Module({
  imports: [
    ClientsModule.register([
      { name: 'MATH_SERVICE', transport: Transport.TCP },
    ]),
  ]
  ...
})
Once the module has been imported, we can inject an instance of the ClientProxy configured as specified via the 'MATH_SERVICE' transporter options shown above, using the @Inject() decorator.
constructor(
  @Inject('MATH_SERVICE') private client: ClientProxy,
) {}
info Hint The
ClientsModuleandClientProxyclasses are imported from the@nestjs/microservicespackage.
At times we may need to fetch the transporter configuration from another service (say a ConfigService), rather than hard-coding it in our client application. To do this, we can register a custom provider using the ClientProxyFactory class. This class has a static create() method, which accepts a transporter options object, and returns a customized ClientProxy instance.
@Module({
  providers: [
    {
      provide: 'MATH_SERVICE',
      useFactory: (configService: ConfigService) => {
        const mathSvcOptions = configService.getMathSvcOptions();
        return ClientProxyFactory.create(mathSvcOptions);
      },
      inject: [ConfigService],
    }
  ]
  ...
})
info Hint The
ClientProxyFactoryis imported from the@nestjs/microservicespackage.
Another option is to use the @Client() property decorator.
@Client({ transport: Transport.TCP })
client: ClientProxy;
info Hint The
@Client()decorator is imported from the@nestjs/microservicespackage.
Using the @Client() decorator is not the preferred technique, as it is harder to test and harder to share a client instance.
The ClientProxy is lazy. It doesn't initiate a connection immediately. Instead, it will be established before the first microservice call, and then reused across each subsequent call. However, if you want to delay the application bootstrapping process until a connection is established, you can manually initiate a connection using the ClientProxy object's connect() method inside the OnApplicationBootstrap lifecycle hook.
@@filename()
async onApplicationBootstrap() {
  await this.client.connect();
}
If the connection cannot be created, the connect() method will reject with the corresponding error object.
Sending messages
The ClientProxy exposes a send() method. This method is intended to call the microservice and returns an Observable with its response. Thus, we can subscribe to the emitted values easily.
@@filename()
accumulate(): Observable<number> {
  const pattern = { cmd: 'sum' };
  const payload = [1, 2, 3];
  return this.client.send<number>(pattern, payload);
}
@@switch
accumulate() {
  const pattern = { cmd: 'sum' };
  const payload = [1, 2, 3];
  return this.client.send(pattern, payload);
}
The send() method takes two arguments, pattern and payload. The pattern should match one defined in a @MessagePattern() decorator. The payload is a message that we want to transmit to the remote microservice. This method returns a cold Observable, which means that you have to explicitly subscribe to it before the message will be sent.
Publishing events
To send an event, use the ClientProxy object's emit() method. This method publishes an event to the message broker.
@@filename()
async publish() {
  this.client.emit<number>('user_created', new UserCreatedEvent());
}
@@switch
async publish() {
  this.client.emit('user_created', new UserCreatedEvent());
}
The emit() method takes two arguments, pattern and payload. The patternshould match one defined in an @EventPattern() decorator. The payload is an event payload that we want to transmit to the remote microservice. This method returns a hot Observable (unlike the cold Observable returned by send()), which means that whether or not you explicitly subscribe to the observable, the proxy will immediately try to deliver the event.
Scopes
For people coming from different programming language backgrounds, it might be unexpected to learn that in Nest, almost everything is shared across incoming requests. We have a connection pool to the database, singleton services with global state, etc. Remember that Node.js doesn't follow the request/response Multi-Threaded Stateless Model in which every request is processed by a separate thread. Hence, using singleton instances is fully safe for our applications.
However, there are edge-cases when request-based lifetime of the handler may be the desired behavior, for instance per-request caching in GraphQL applications, request tracking or multi-tenancy. Learn how to control scopes here.
Request-scoped handlers and providers can inject RequestContext using the @Inject() decorator in combination with CONTEXT token:
import { Injectable, Scope, Inject } from '@nestjs/common';
import { CONTEXT, RequestContext } from '@nestjs/microservices';

@Injectable({ scope: Scope.REQUEST })
export class CatsService {
  constructor(@Inject(CONTEXT) private ctx: RequestContext) {}
}
This provides access to the RequestContext object, which has two properties:
export interface RequestContext<T = any> {
  pattern: string | Record<string, any>;
  data: T;
}
The data property is the message payload sent by the message producer. The pattern property is the pattern used to identify an appropriate handler to handle the incoming message.
Handling timeouts
In distributed systems, sometimes microservices might be down or not available. To avoid infinitely long waiting, you can use Timeouts. A timeout is an incredibly useful pattern when communicating with other services. To apply timeouts to your microservice calls, you can use the RxJS timeout operator. If the microservice does not respond to the request within a certain time, an exception is thrown, which can be caught and handled appropriately.
To solve this problem you have to use rxjs package. Just use the timeout operator in the pipe:
@@filename()
this.client
      .send<TResult, TInput>(pattern, data)
      .pipe(timeout(5000));
@@switch
this.client
      .send(pattern, data)
      .pipe(timeout(5000));
info Hint The
timeoutoperator is imported from therxjs/operatorspackage.
After 5 seconds, if the microservice isn't responding, it will throw an error.