Pipes
A pipe is a class annotated with the @Injectable() decorator, which implements the PipeTransform interface.
Pipes have two typical use cases:
- transformation: transform input data to the desired form (e.g., from string to integer)
- validation: evaluate input data and if valid, simply pass it through unchanged; otherwise, throw an exception
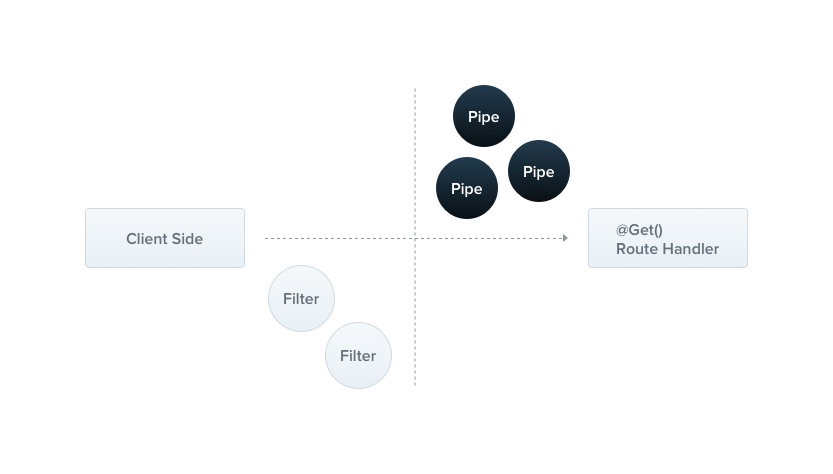
In both cases, pipes operate on the arguments being processed by a controller route handler. Nest interposes a pipe just before a method is invoked, and the pipe receives the arguments destined for the method and operates on them. Any transformation or validation operation takes place at that time, after which the route handler is invoked with any (potentially) transformed arguments.
Nest comes with a number of built-in pipes that you can use out-of-the-box. You can also build your own custom pipes. In this chapter, we'll introduce the built-in pipes and show how to bind them to route handlers. We'll then examine several custom-built pipes to show how you can build one from scratch.
info Hint Pipes run inside the exceptions zone. This means that when a Pipe throws an exception it is handled by the exceptions layer (global exceptions filter and any exceptions filters that are applied to the current context). Given the above, it should be clear that when an exception is thrown in a Pipe, no controller method is subsequently executed. This gives you a best-practice technique for validating data coming into the application from external sources at the system boundary.
Built-in pipes
Nest comes with nine pipes available out-of-the-box:
ValidationPipeParseIntPipeParseFloatPipeParseBoolPipeParseArrayPipeParseUUIDPipeParseEnumPipeDefaultValuePipeParseFilePipe
They're exported from the @nestjs/common package.
Let's take a quick look at using ParseIntPipe. This is an example of the transformation use case, where the pipe ensures that a method handler parameter is converted to a JavaScript integer (or throws an exception if the conversion fails). Later in this chapter, we'll show a simple custom implementation for a ParseIntPipe. The example techniques below also apply to the other built-in transformation pipes (ParseBoolPipe, ParseFloatPipe, ParseEnumPipe, ParseArrayPipe and ParseUUIDPipe, which we'll refer to as the Parse* pipes in this chapter).
Binding pipes
To use a pipe, we need to bind an instance of the pipe class to the appropriate context. In our ParseIntPipe example, we want to associate the pipe with a particular route handler method, and make sure it runs before the method is called. We do so with the following construct, which we'll refer to as binding the pipe at the method parameter level:
@Get(':id')
async findOne(@Param('id', ParseIntPipe) id: number) {
  return this.catsService.findOne(id);
}
This ensures that one of the following two conditions is true: either the parameter we receive in the findOne() method is a number (as expected in our call to this.catsService.findOne()), or an exception is thrown before the route handler is called.
For example, assume the route is called like:
GET localhost:3000/abc
Nest will throw an exception like this:
{
  "statusCode": 400,
  "message": "Validation failed (numeric string is expected)",
  "error": "Bad Request"
}
The exception will prevent the body of the findOne() method from executing.
In the example above, we pass a class (ParseIntPipe), not an instance, leaving responsibility for instantiation to the framework and enabling dependency injection. As with pipes and guards, we can instead pass an in-place instance. Passing an in-place instance is useful if we want to customize the built-in pipe's behavior by passing options:
@Get(':id')
async findOne(
  @Param('id', new ParseIntPipe({ errorHttpStatusCode: HttpStatus.NOT_ACCEPTABLE }))
  id: number,
) {
  return this.catsService.findOne(id);
}
Binding the other transformation pipes (all of the Parse* pipes) works similarly. These pipes all work in the context of validating route parameters, query string parameters and request body values.
For example with a query string parameter:
@Get()
async findOne(@Query('id', ParseIntPipe) id: number) {
  return this.catsService.findOne(id);
}
Here's an example of using the ParseUUIDPipe to parse a string parameter and validate if it is a UUID.
@@filename()
@Get(':uuid')
async findOne(@Param('uuid', new ParseUUIDPipe()) uuid: string) {
  return this.catsService.findOne(uuid);
}
@@switch
@Get(':uuid')
@Bind(Param('uuid', new ParseUUIDPipe()))
async findOne(uuid) {
  return this.catsService.findOne(uuid);
}
info Hint When using
ParseUUIDPipe()you are parsing UUID in version 3, 4 or 5, if you only require a specific version of UUID you can pass a version in the pipe options.
Above we've seen examples of binding the various Parse* family of built-in pipes. Binding validation pipes is a little bit different; we'll discuss that in the following section.
info Hint Also, see Validation techniques for extensive examples of validation pipes.
Custom pipes
As mentioned, you can build your own custom pipes. While Nest provides a robust built-in ParseIntPipe and ValidationPipe, let's build simple custom versions of each from scratch to see how custom pipes are constructed.
We start with a simple ValidationPipe. Initially, we'll have it simply take an input value and immediately return the same value, behaving like an identity function.
@@filename(validation.pipe)
import { PipeTransform, Injectable, ArgumentMetadata } from '@nestjs/common';

@Injectable()
export class ValidationPipe implements PipeTransform {
  transform(value: any, metadata: ArgumentMetadata) {
    return value;
  }
}
@@switch
import { Injectable } from '@nestjs/common';

@Injectable()
export class ValidationPipe {
  transform(value, metadata) {
    return value;
  }
}
info Hint
PipeTransform<T, R>is a generic interface that must be implemented by any pipe. The generic interface usesTto indicate the type of the inputvalue, andRto indicate the return type of thetransform()method.
Every pipe must implement the transform() method to fulfill the PipeTransform interface contract. This method has two parameters:
valuemetadata
The value parameter is the currently processed method argument (before it is received by the route handling method), and metadata is the currently processed method argument's metadata. The metadata object has these properties:
export interface ArgumentMetadata {
  type: 'body' | 'query' | 'param' | 'custom';
  metatype?: Type<unknown>;
  data?: string;
}
These properties describe the currently processed argument.
type | Indicates whether the argument is a body
@Body(), query
@Query(), param
@Param(), or a custom parameter (read more
here). |
metatype | Provides the metatype of the argument, for example,
|
data | The string passed to the decorator, for example
@Body('string'). It's
undefined if you leave the decorator parenthesis empty. |
warning Warning TypeScript interfaces disappear during transpilation. Thus, if a method parameter's type is declared as an interface instead of a class, the
metatypevalue will beObject.
Schema based validation
Let's make our validation pipe a little more useful. Take a closer look at the create() method of the CatsController, where we probably would like to ensure that the post body object is valid before attempting to run our service method.
@@filename()
@Post()
async create(@Body() createCatDto: CreateCatDto) {
  this.catsService.create(createCatDto);
}
@@switch
@Post()
async create(@Body() createCatDto) {
  this.catsService.create(createCatDto);
}
Let's focus in on the createCatDto body parameter. Its type is CreateCatDto:
@@filename(create-cat.dto)
export class CreateCatDto {
  name: string;
  age: number;
  breed: string;
}
We want to ensure that any incoming request to the create method contains a valid body. So we have to validate the three members of the createCatDto object. We could do this inside the route handler method, but doing so is not ideal as it would break the single responsibility principle (SRP).
Another approach could be to create a validator class and delegate the task there. This has the disadvantage that we would have to remember to call this validator at the beginning of each method.
How about creating validation middleware? This could work, but unfortunately, it's not possible to create generic middleware which can be used across all contexts across the whole application. This is because middleware is unaware of the execution context, including the handler that will be called and any of its parameters.
This is, of course, exactly the use case for which pipes are designed. So let's go ahead and refine our validation pipe.
Object schema validation
There are several approaches available for doing object validation in a clean, DRY way. One common approach is to use schema-based validation. Let's go ahead and try that approach.
The Zod library allows you to create schemas in a straightforward way, with a readable API. Let's build a validation pipe that makes use of Zod-based schemas.
Start by installing the required package:
$ npm install --save zod
In the code sample below, we create a simple class that takes a schema as a constructor argument. We then apply the schema.parse() method, which validates our incoming argument against the provided schema.
As noted earlier, a validation pipe either returns the value unchanged or throws an exception.
In the next section, you'll see how we supply the appropriate schema for a given controller method using the @UsePipes() decorator. Doing so makes our validation pipe reusable across contexts, just as we set out to do.
@@filename()
import { PipeTransform, ArgumentMetadata, BadRequestException } from '@nestjs/common';
import { ZodSchema  } from 'zod';

export class ZodValidationPipe implements PipeTransform {
  constructor(private schema: ZodSchema) {}

  transform(value: unknown, metadata: ArgumentMetadata) {
    try {
      const parsedValue = this.schema.parse(value);
      return parsedValue;
    } catch (error) {
      throw new BadRequestException('Validation failed');
    }
  }
}
@@switch
import { BadRequestException } from '@nestjs/common';

export class ZodValidationPipe {
  constructor(private schema) {}

  transform(value, metadata) {
    try {
      const parsedValue = this.schema.parse(value);
      return parsedValue;
    } catch (error) {
      throw new BadRequestException('Validation failed');
    }
  }
}
Binding validation pipes
Earlier, we saw how to bind transformation pipes (like ParseIntPipe and the rest of the Parse* pipes).
Binding validation pipes is also very straightforward.
In this case, we want to bind the pipe at the method call level. In our current example, we need to do the following to use the ZodValidationPipe:
- Create an instance of the
ZodValidationPipe - Pass the context-specific Zod schema in the class constructor of the pipe
- Bind the pipe to the method
Zod schema example:
import { z } from 'zod';

export const createCatSchema = z
  .object({
    name: z.string(),
    age: z.number(),
    breed: z.string(),
  })
  .required();

export type CreateCatDto = z.infer<typeof createCatSchema>;
We do that using the @UsePipes() decorator as shown below:
@@filename(cats.controller)
@Post()
@UsePipes(new ZodValidationPipe(createCatSchema))
async create(@Body() createCatDto: CreateCatDto) {
  this.catsService.create(createCatDto);
}
@@switch
@Post()
@Bind(Body())
@UsePipes(new ZodValidationPipe(createCatSchema))
async create(createCatDto) {
  this.catsService.create(createCatDto);
}
info Hint The
@UsePipes()decorator is imported from the@nestjs/commonpackage.
warning Warning
zodlibrary requires thestrictNullChecksconfiguration to be enabled in yourtsconfig.jsonfile.
Class validator
warning Warning The techniques in this section require TypeScript and are not available if your app is written using vanilla JavaScript.
Let's look at an alternate implementation for our validation technique.
Nest works well with the class-validator library. This powerful library allows you to use decorator-based validation. Decorator-based validation is extremely powerful, especially when combined with Nest's Pipe capabilities since we have access to the metatype of the processed property. Before we start, we need to install the required packages:
$ npm i --save class-validator class-transformer
Once these are installed, we can add a few decorators to the CreateCatDto class. Here we see a significant advantage of this technique: the CreateCatDto class remains the single source of truth for our Post body object (rather than having to create a separate validation class).
@@filename(create-cat.dto)
import { IsString, IsInt } from 'class-validator';

export class CreateCatDto {
  @IsString()
  name: string;

  @IsInt()
  age: number;

  @IsString()
  breed: string;
}
info Hint Read more about the class-validator decorators here.
Now we can create a ValidationPipe class that uses these annotations.
@@filename(validation.pipe)
import { PipeTransform, Injectable, ArgumentMetadata, BadRequestException } from '@nestjs/common';
import { validate } from 'class-validator';
import { plainToInstance } from 'class-transformer';

@Injectable()
export class ValidationPipe implements PipeTransform<any> {
  async transform(value: any, { metatype }: ArgumentMetadata) {
    if (!metatype || !this.toValidate(metatype)) {
      return value;
    }
    const object = plainToInstance(metatype, value);
    const errors = await validate(object);
    if (errors.length > 0) {
      throw new BadRequestException('Validation failed');
    }
    return value;
  }

  private toValidate(metatype: Function): boolean {
    const types: Function[] = [String, Boolean, Number, Array, Object];
    return !types.includes(metatype);
  }
}
info Hint As a reminder, you don't have to build a generic validation pipe on your own since the
ValidationPipeis provided by Nest out-of-the-box. The built-inValidationPipeoffers more options than the sample we built in this chapter, which has been kept basic for the sake of illustrating the mechanics of a custom-built pipe. You can find full details, along with lots of examples here.
warning Notice We used the class-transformer library above which is made by the same author as the class-validator library, and as a result, they play very well together.
Let's go through this code. First, note that the transform() method is marked as async. This is possible because Nest supports both synchronous and asynchronous pipes. We make this method async because some of the class-validator validations can be async (utilize Promises).
Next note that we are using destructuring to extract the metatype field (extracting just this member from an ArgumentMetadata) into our metatype parameter. This is just shorthand for getting the full ArgumentMetadata and then having an additional statement to assign the metatype variable.
Next, note the helper function toValidate(). It's responsible for bypassing the validation step when the current argument being processed is a native JavaScript type (these can't have validation decorators attached, so there's no reason to run them through the validation step).
Next, we use the class-transformer function plainToInstance() to transform our plain JavaScript argument object into a typed object so that we can apply validation. The reason we must do this is that the incoming post body object, when deserialized from the network request, does not have any type information (this is the way the underlying platform, such as Express, works). Class-validator needs to use the validation decorators we defined for our DTO earlier, so we need to perform this transformation to treat the incoming body as an appropriately decorated object, not just a plain vanilla object.
Finally, as noted earlier, since this is a validation pipe it either returns the value unchanged, or throws an exception.
The last step is to bind the ValidationPipe. Pipes can be parameter-scoped, method-scoped, controller-scoped, or global-scoped. Earlier, with our Zod-based validation pipe, we saw an example of binding the pipe at the method level.
In the example below, we'll bind the pipe instance to the route handler @Body() decorator so that our pipe is called to validate the post body.
@@filename(cats.controller)
@Post()
async create(
  @Body(new ValidationPipe()) createCatDto: CreateCatDto,
) {
  this.catsService.create(createCatDto);
}
Parameter-scoped pipes are useful when the validation logic concerns only one specified parameter.
Global scoped pipes
Since the ValidationPipe was created to be as generic as possible, we can realize its full utility by setting it up as a global-scoped pipe so that it is applied to every route handler across the entire application.
@@filename(main)
async function bootstrap() {
  const app = await NestFactory.create(AppModule);
  app.useGlobalPipes(new ValidationPipe());
  await app.listen(3000);
}
bootstrap();
warning Notice In the case of hybrid apps the
useGlobalPipes()method doesn't set up pipes for gateways and microservices. For "standard" (non-hybrid) microservice apps,useGlobalPipes()does mount pipes globally.
Global pipes are used across the whole application, for every controller and every route handler.
Note that in terms of dependency injection, global pipes registered from outside of any module (with useGlobalPipes() as in the example above) cannot inject dependencies since the binding has been done outside the context of any module. In order to solve this issue, you can set up a global pipe directly from any module using the following construction:
@@filename(app.module)
import { Module } from '@nestjs/common';
import { APP_PIPE } from '@nestjs/core';

@Module({
  providers: [
    {
      provide: APP_PIPE,
      useClass: ValidationPipe,
    },
  ],
})
export class AppModule {}
info Hint When using this approach to perform dependency injection for the pipe, note that regardless of the module where this construction is employed, the pipe is, in fact, global. Where should this be done? Choose the module where the pipe (
ValidationPipein the example above) is defined. Also,useClassis not the only way of dealing with custom provider registration. Learn more here.
The built-in ValidationPipe
As a reminder, you don't have to build a generic validation pipe on your own since the ValidationPipe is provided by Nest out-of-the-box. The built-in ValidationPipe offers more options than the sample we built in this chapter, which has been kept basic for the sake of illustrating the mechanics of a custom-built pipe. You can find full details, along with lots of examples here.
Transformation use case
Validation isn't the only use case for custom pipes. At the beginning of this chapter, we mentioned that a pipe can also transform the input data to the desired format. This is possible because the value returned from the transform function completely overrides the previous value of the argument.
When is this useful? Consider that sometimes the data passed from the client needs to undergo some change - for example converting a string to an integer - before it can be properly handled by the route handler method. Furthermore, some required data fields may be missing, and we would like to apply default values. Transformation pipes can perform these functions by interposing a processing function between the client request and the request handler.
Here's a simple ParseIntPipe which is responsible for parsing a string into an integer value. (As noted above, Nest has a built-in ParseIntPipe that is more sophisticated; we include this as a simple example of a custom transformation pipe).
@@filename(parse-int.pipe)
import { PipeTransform, Injectable, ArgumentMetadata, BadRequestException } from '@nestjs/common';

@Injectable()
export class ParseIntPipe implements PipeTransform<string, number> {
  transform(value: string, metadata: ArgumentMetadata): number {
    const val = parseInt(value, 10);
    if (isNaN(val)) {
      throw new BadRequestException('Validation failed');
    }
    return val;
  }
}
@@switch
import { Injectable, BadRequestException } from '@nestjs/common';

@Injectable()
export class ParseIntPipe {
  transform(value, metadata) {
    const val = parseInt(value, 10);
    if (isNaN(val)) {
      throw new BadRequestException('Validation failed');
    }
    return val;
  }
}
We can then bind this pipe to the selected param as shown below:
@@filename()
@Get(':id')
async findOne(@Param('id', new ParseIntPipe()) id) {
  return this.catsService.findOne(id);
}
@@switch
@Get(':id')
@Bind(Param('id', new ParseIntPipe()))
async findOne(id) {
  return this.catsService.findOne(id);
}
Another useful transformation case would be to select an existing user entity from the database using an id supplied in the request:
@@filename()
@Get(':id')
findOne(@Param('id', UserByIdPipe) userEntity: UserEntity) {
  return userEntity;
}
@@switch
@Get(':id')
@Bind(Param('id', UserByIdPipe))
findOne(userEntity) {
  return userEntity;
}
We leave the implementation of this pipe to the reader, but note that like all other transformation pipes, it receives an input value (an id) and returns an output value (a UserEntity object). This can make your code more declarative and DRY by abstracting boilerplate code out of your handler and into a common pipe.
Providing defaults
Parse* pipes expect a parameter's value to be defined. They throw an exception upon receiving null or undefined values. To allow an endpoint to handle missing querystring parameter values, we have to provide a default value to be injected before the Parse* pipes operate on these values. The DefaultValuePipe serves that purpose. Simply instantiate a DefaultValuePipe in the @Query() decorator before the relevant Parse* pipe, as shown below:
@@filename()
@Get()
async findAll(
  @Query('activeOnly', new DefaultValuePipe(false), ParseBoolPipe) activeOnly: boolean,
  @Query('page', new DefaultValuePipe(0), ParseIntPipe) page: number,
) {
  return this.catsService.findAll({ activeOnly, page });
}